WordPress Edit Posts from Front-end
- Article
- Comment (2)
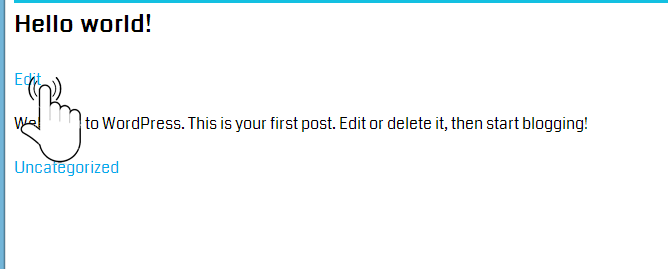
WordPress Edit Posts from Front-end is one of user friendly thing while we preventing back end access for unknown users. Here I am going to share some steps to create post editor on the front end. Lets start with creating a edit link from the post view page. So just open your WordPress active theme folder and open “ single.php ” on your desired text editor. You can place a edit option there and check before the current user is the author for the article or not and allow them to view a edit button. The following code help you to create the edit button on the posts page.
<?php global $current_user;
      get_currentuserinfo();
	  $kv_author =get_the_author_meta('ID');
	   if($current_user->ID == $kv_author){
				 echo '<a href="'.site_url('edit-post').'?post-id='.get_the_ID().'"> Edit</a>';
		}?>
Add the above line of codes to your Single.php inside the while loop after the title or after the end of body content.
The above code just create a link with the current post id pass it with a page url . So we can reterive the post information with the help of the post id. And now we need a page to perform edit operations. So use the following code to create a custom page through programmatically or just create custom page from the back end.
<?php
function kv_create_edit_page() {

$page = get_pages();
	$edit_page= array(	'slug' => 'edit-post',	'title' =>'Edit Posts from the front-end');

foreach ($pages as $page) {
		$apage = $page->post_name;
		 switch ( $apage ){
			case 'edit' :   	$edit_found= '1';		break;
			default:					$no_page;
		}
	}

	if($edit_found != '1'){
		$page_id = wp_insert_post(array(
			'post_title' => $edit_page['title'],
			'post_type' =>'page',
			'post_name' => $edit_page['slug'],
			'post_status' => 'publish',
			'post_excerpt' => 'User profile and author page details page ! '
		));
	add_post_meta( $page_id, '_wp_page_template', 'kv-edit.php' );
	}
}
add_action('admin_init', 'kv_create_edit_page');
?>
One of my previous post describes the steps already, Even-though I specified here for your reference. The above code check whether a page exist on the same name or not, if no page is available on the name it will create a page on the title. Just place the above code on your theme ” functions.php “. Next step is to create a php file on your themes directory namely kv-edit.php. Which we specified on the above code.
<?php
/**
Template Name: Edit Posts
*/


?>
The file going to take care of the edit operations. We need to user normal querying functions to get the entire content of the post and edit here. Just use the following code to perform basic edit operations.
<?php
/*
Template Name: Edit post
*/
get_header();

if (isset ($_GET['post-id'])) {
		$postid = $_GET['post-id'];
}
$post_complete = get_post($postid);

$title = $post_complete->post_title;

$content = $post_complete->post_content;

$attachmen = $post_complete->post_mime_type;

$post_author = $post_complete->post_author;

$auth_id = $current_user->ID ;

if (isset ($_POST['post_title'])) {
		 echo $posttit= $_POST['post_title'];
	}
$at_arg= array(
		'post_type' => 'attachment',
		'numberposts' => -1,
		'post_parents' => $postid );
	$attachments = get_posts($at_arg);
	if ($attachments) {
		foreach($attachments as $attachment) {
			echo wp_get_attachment_url($attachment, false);
		}
	}


 if( 'POST' == $_SERVER['REQUEST_METHOD'] && !empty( $_POST['action'] ) &&  $_POST['action'] == "new_post") {

	// Do some minor form validation to make sure there is content
	if (isset ($_POST['title'])) {
		$title =  $_POST['title'];
	} else {
		echo 'Please enter the wine name';
	}
	if (isset ($_POST['description'])) {
		$description = $_POST['description'];
	} else {
		echo 'Please enter some notes';
	}

	$tags = $_POST['post_tags'];
	$post_cat = $_POST['cat'];
	// ADD THE FORM INPUT TO $new_post ARRAY
	$new_post = array(
	'post_title'	=>	$title,
	'post_content'	=>	$description,
	'post_category' =>   $post_cat,  // Usable for custom taxonomies too
	'tags_input'	=>	array($tags),
	'post_status'	=>	'pending',           // Choose: publish, preview, future, draft, etc.
	'post_type'	=>	'post'  //'post',page' or use a custom post type if you want to
	);

	//SAVE THE POST
	$pid = wp_insert_post($new_post);

             //SET OUR TAGS UP PROPERLY
	wp_set_post_tags($pid, $_POST['post_tags']);

	if ( isset( $_POST['price'] ) )
	update_post_meta($pid, 'price', esc_attr( $_POST['price'] ));

	//REDIRECT TO THE NEW POST ON SAVE
	$link = get_permalink( $pid );
	wp_redirect( home_url() );


if ($_FILES) {
	foreach ($_FILES as $file => $array) {
	$newupload = insert_attachment($file,$pid);
	// $newupload returns the attachment id of the file that
	// was just uploaded. Do whatever you want with that now.
	}

} // END THE IF STATEMENT THAT STARTED THE WHOLE FORM

//POST THE POST YO
do_action('wp_insert_post', 'wp_insert_post');

}

?>
<section id="main-content">
<!-- Submit a Project Form  -->
		 <?php if ( !is_user_logged_in() ) : ?>
                    <p class="warning">
                        <?php _e('You must be logged in to post your project.', 'project'); ?>
                    </p><!-- .warning -->
            <?php else : ?>

<?php if( $post_author == $current_user->ID ) { ?>


		<form id="edit_post" name="edit_post" method="post" action="<?php bloginfo('url'); ?>/edit-post/" enctype="multipart/form-data">


			<!-- post name -->
			<table > <tr>
				<td> <label for="title">Post Title:</label> </td> <td>
				<input type="text" id="title" value="<?php echo $title;?>" tabindex="5" name="title"/>
			</td></tr>

			<!-- post Category -->
			<tr class="category">
				<td> <label for="cat">Category:</label> </td>
					<td> 	<?php $select_cats = wp_dropdown_categories( array( 'echo' => 0, 'taxonomy' => 'category', 'hide_empty' => 0 ) );
		$select_cats = str_replace( "name='cat' id=", "name='cat[]' multiple='multiple' id=", $select_cats );
		echo $select_cats; ?> </td>
			</tr>

			<!-- post Content -->
			<tr class="content">
				<td> <label for="description"> Post Content : </label> </td>
				<td> <textarea id="description" tabindex="15" name="description" cols="50" rows="10"> <?php echo $content ; ?> </textarea> </td>
			</tr>


			<tr>
				<td> <label for="thumbnail">Thumbnail Image:</label></td>
			<td>	<input type="file" id="async-upload" name="async-upload">

				<input type="text" value="<?php echo get_attached_file($attachment->ID); ?>" name="atta" id="atta" /> </td>
			</tr>
						<!-- post tags -->
			<tr class="tags">
				<td> <label for="post_tags">Additional Keywords (comma separated):</label> </td>
				<td> <input type="text" value="" tabindex="35" name="post_tags" id="post_tags" /> </td>
			</tr>

			<tr class="submit">
			<td colspan="2" >	<input type="submit" value="Post Review" tabindex="40" class="button" name="submit" /> </td>
			</tr>
			</table>
		</form>
</div>


<?php } else {  ?>

<p><?php _e('Sorry, no posts matched your criteria.'); ?></p>
<?php } ?>

 <?php endif; ?>
</section>
<?php   get_sidebar();

get_footer();

?>
Thats it.
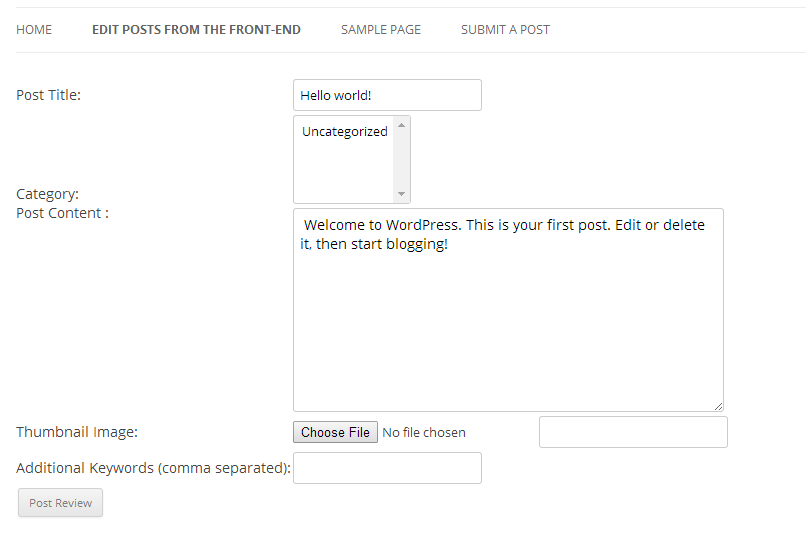
The edit screen looks like this.
If you want to add any TinyMCE Edtior. WordPress post editor on your front end, Just use the following line of code inside the code area. just find the following line of codes ,
<!-- post Content -->
			<tr class="content">
				<td> <label for="description"> Post Content : </label> </td>
				<td> <textarea id="description" tabindex="15" name="description" cols="50" rows="10"> <?php echo $content ; ?> </textarea> </td>
			</tr>
And replace with the following code,
<!-- post Content -->
			<tr class="content">
				<td> <label for="description"> Post Content : </label> </td>
				<td>     <?php wp_editor( $content, 'description' ); ?></td>
			</tr>
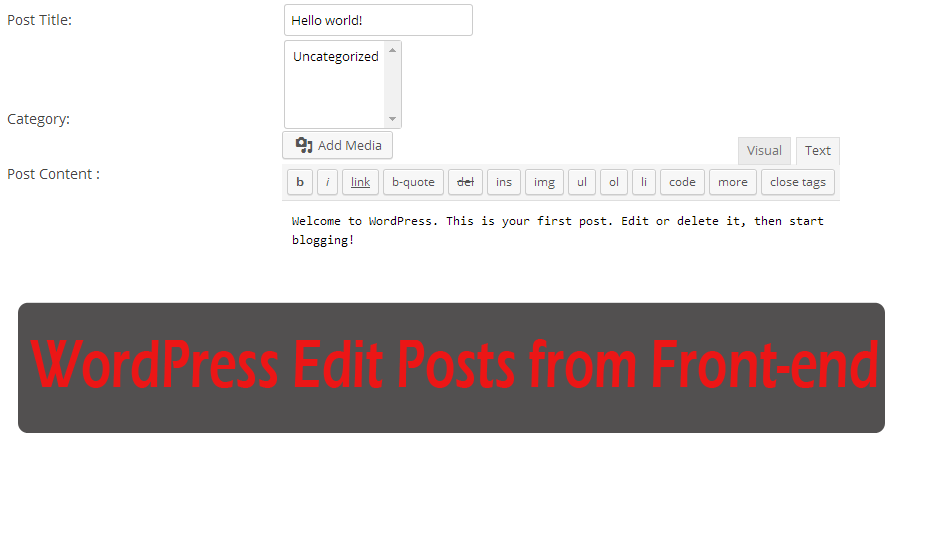
Than you can get Attachment options here. You can get more detailed working options of TinyMCE editor here. And your result edit post page looks like this.


I am a friend from abroad. Please comment, similar to edit posts in front end tutorial can recommend a few articles? I just can’t search to domestic relevant tutorial, thank you.
sorry, I dont have much, than mine